Best Way To Tile Around A Bath : Pin on Finished Master Bathroom / For a tub surround only, install the backerboard and tile 12 inches above the tub.. Follow the order shown in the diagram to snap the rest of the lines. First, use the smooth surface of the trowel to evenly distribute the adhesive. Then, in a vertical motion, use the notched edge of the trowel to create tidy rows of ridges in the adhesive. Once you are ready to lay the tile, start at the corner, with the chair rail border (image 2). Kasbah trellis in neutral motif // design + photo:
Don't tile around the toilet flange—the circular piece that connects to the drain pipe and upon which the toilet itself will rest—until the end. This is placed upon the bath and the other leaf is tiled over using the first course of tiles. You can even continue the tile onto the floor for a continuous look. Plan to extend the tile 2 or 3 in. Heather from the heathered nest here at remodelaholic again today, and i want to show you all you remodelaholics how you can do this project, too.
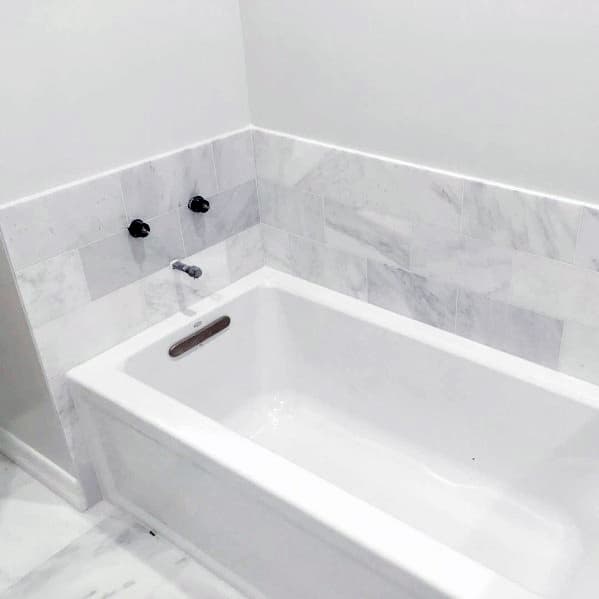
Top 60 Best Bathtub Tile Ideas - Wall Surround Designs from nextluxury.com When you tile around it get some of that bath and tile surround from the diy mercants. Apply it to the wall with the bottom edge about 1/4 in. Use a small amount of the excess mortar and spread it onto the back of a tile with the notched side of the trowel. When autocomplete results are available use up and down arrows to review and enter to select. Plan the tile layout so a column of tile extends past the end of the tub. Turn over the trowel to the notched side and comb over in one direction. Cleaning the tiles ensure that you will get a good adhesive bond. When it came time to tile around the plumbing, we held our tile in place to get the height of the pipe and then to the side to get the distance we needed from the edge of the tile.
Plan to extend the tile 2 or 3 in.
Check if you need to adjust this mark to avoid laying slivers of tile at the top and bottom. Don't tile around the toilet flange—the circular piece that connects to the drain pipe and upon which the toilet itself will rest—until the end. And we set the tile. The process, which takes four steps, begins by first measuring the space to be tiled. Whether you want to learn to tile a sprawling main bathroom for a whole family to use or just a small bathroom, you'll still need. We love the clean look of the straight set tile in the bathrooms below. C) when sealing between the bath and the wall tiles around it, we ensure that we fill the bath full of water. Before starting, you'll use graph paper to lay out a scaled. Divide the dimension in half and make a mark there. Make sure bath is fixed securely pump mastic down sides of bath that touch walls level with top of bath when set tile down to bath leaving a 5mm gap between tile and bath when tiles are set seal 5mm gap with coloured waterproof mastic of your choice. Above the lip of the tub. Difference is close to 1/2″ inch in just a few feet from the middle of the floor sloping down towards the vent. Cleaning the tiles ensure that you will get a good adhesive bond.
The key here is to ensure your ledger board is perfectly level all the way around the tub because this will be what supports the tile. You can even continue the tile onto the floor for a continuous look. When tiling around a tub, mark the first layout line at the vertical edge of the tile next to the tub. Heather from the heathered nest here at remodelaholic again today, and i want to show you all you remodelaholics how you can do this project, too. This is placed upon the bath and the other leaf is tiled over using the first course of tiles.
Top 60 Best Bathtub Tile Ideas - Wall Surround Designs from nextluxury.com Then, in a vertical motion, use the notched edge of the trowel to create tidy rows of ridges in the adhesive. Use the method shown in the mock up and measure photo above to determine how wide the corner tile needs to be in order to extend the tile beyond the tub. Here are the details to getting the process going right. Turn over the trowel to the notched side and comb over in one direction. If the tub is level, start with a full tile at its rim. To lay the tile, you'll need to mix up a batch of thinset, which is pretty straightforward. This is placed upon the bath and the other leaf is tiled over using the first course of tiles. Lee wallender when tiling bathtubs, backsplashes, and other areas that use limited quantities of tile, buy the best quality tile you can afford.
If you will need a small slip of tile then you may prefer to have a part tile near the bath lip or at the top of your tiled area.
Beyond the tub and to leave at least a half tile along the wall if possible. Run a damp sponge over the backer board in the area you intend to tile. Kasbah trellis in neutral motif // design + photo: When it came time to tile around the plumbing, we held our tile in place to get the height of the pipe and then to the side to get the distance we needed from the edge of the tile. After dry setting and laying out our cut tile (12″x24″), a series of tile around an air vent teetered and lipped the next series of tiles. Difference is close to 1/2″ inch in just a few feet from the middle of the floor sloping down towards the vent. Use a small amount of the excess mortar and spread it onto the back of a tile with the notched side of the trowel. Above the lip of the tub. Use the method shown in the mock up and measure photo above to determine how wide the corner tile needs to be in order to extend the tile beyond the tub. Check if you need to adjust this mark to avoid laying slivers of tile at the top and bottom. Heather from the heathered nest here at remodelaholic again today, and i want to show you all you remodelaholics how you can do this project, too. Lee wallender when tiling bathtubs, backsplashes, and other areas that use limited quantities of tile, buy the best quality tile you can afford. When autocomplete results are available use up and down arrows to review and enter to select.
Next, measure the width of the back wall, bisect the width and draw a vertical line down the wall behind the bath. Above the lip of the tub. When you tile around it get some of that bath and tile surround from the diy mercants. Follow the order shown in the diagram to snap the rest of the lines. Thinking about redoing your tile around your tub or learning about setting tile in general?
40549c5710dd3a5f7e06436233c99e15.jpg (480×640) | Bathtub remodel, Shower remodel, Diy bathroom ... from i.pinimg.com The process, which takes four steps, begins by first measuring the space to be tiled. Before starting, you'll use graph paper to lay out a scaled. Kasbah trellis in neutral motif // design + photo: When you tile around it get some of that bath and tile surround from the diy mercants. I cover some of the specifics of how to layout and set up a tub to install tile around it.i'm using th. And we set the tile. Touch device users, explore by touch or with swipe gestures. Tile stickers are a quick and easy solution to cover.
Now you're finally ready to start laying down some tile!
We love the clean look of the straight set tile in the bathrooms below. Tile stickers are a quick and easy solution to cover. I cover some of the specifics of how to layout and set up a tub to install tile around it.i'm using th. When tiling a bathroom, mark out your desired grid pattern on the floor, and lay tile over the unobstructed areas first. Difference is close to 1/2″ inch in just a few feet from the middle of the floor sloping down towards the vent. This ensures the bath or shower tray is fixed solidly, and that any water that gets through a broken or damaged secondary silicon seal will be stopped in its tracks and not get anywhere unwanted. Just know that diagonal tile patterns require more planning, precise measuring, and cutting—especially around the perimeter of the room. Follow the order shown in the diagram to snap the rest of the lines. First, use the smooth surface of the trowel to evenly distribute the adhesive. Add a healthy dollop of the mixture to your trowel and whack it onto a small area you wish to tile. If the tub is level, start with a full tile at its rim. Then, in a vertical motion, use the notched edge of the trowel to create tidy rows of ridges in the adhesive. Don't tile around the toilet flange—the circular piece that connects to the drain pipe and upon which the toilet itself will rest—until the end.